
How to usePRO
Waterfall Planner
Catch your favourite waterfall in full flow. See how much rain has fallen, then let PhotoWatch tell you when it’s worth the trip.
Prefer to watch?
See a waterfall alert in action
Watch the Waterfall Planner at Somersby Falls, from the rain chart to the alert on the lock screen, then follow the 7 steps below at your own pace.
Plays here or Open in YouTube
1
Open the Waterfall Planner
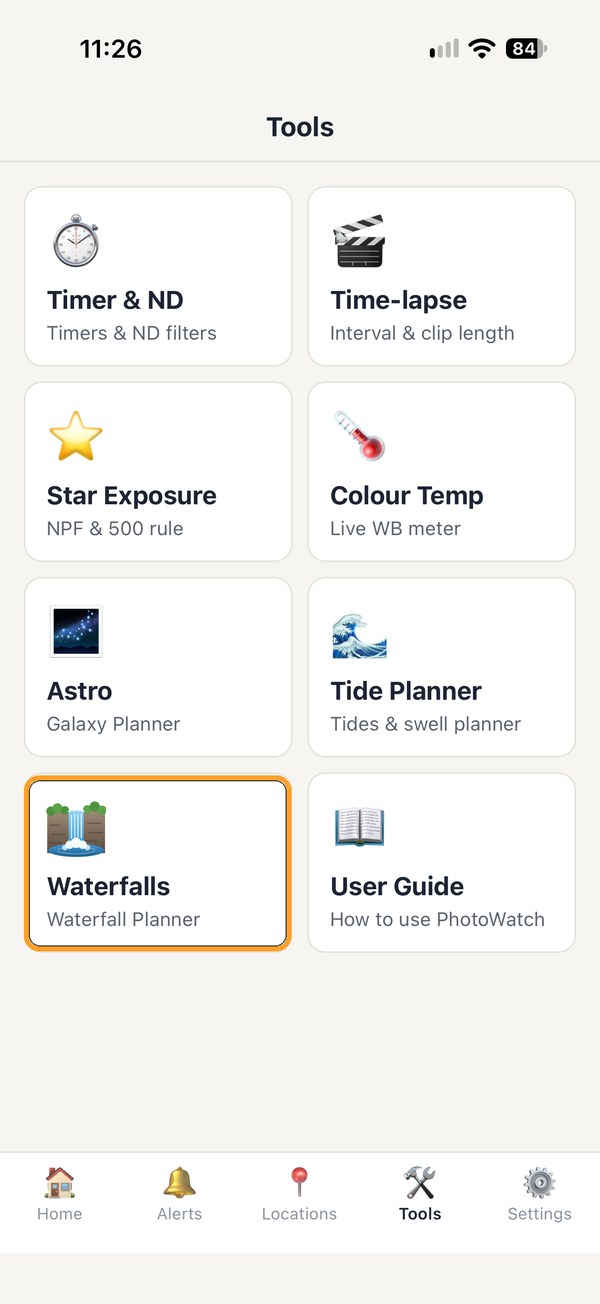
Tap the Tools tab at the bottom of the screen, then tap Waterfalls.
2
Choose your waterfall
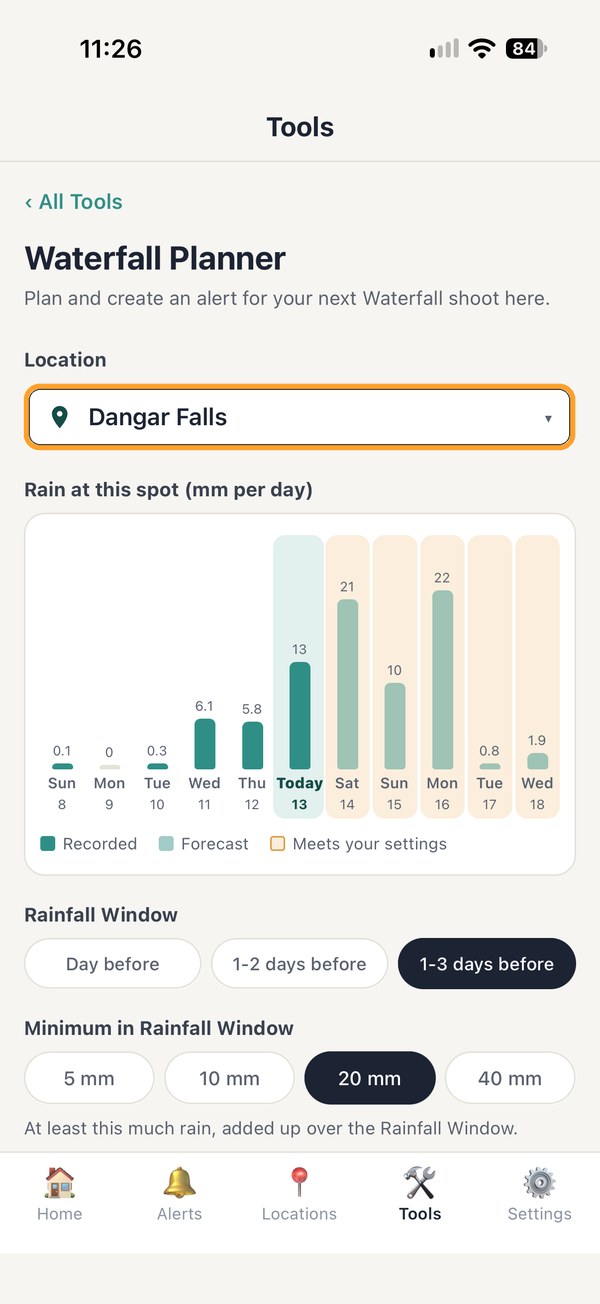
Tap the Location box and pick one of your saved locations. The chart shows the rain at that spot, day by day: the 5 days before today as recorded by PhotoWatch, today, and the next 5 days from the forecast.
Tip: PhotoWatch starts recording the rain at a spot the first time you look at it here or save a waterfall alert for it. A new spot shows No rain recorded yet for the past days, and fills in over the next few days.
3
Set how much rain you need
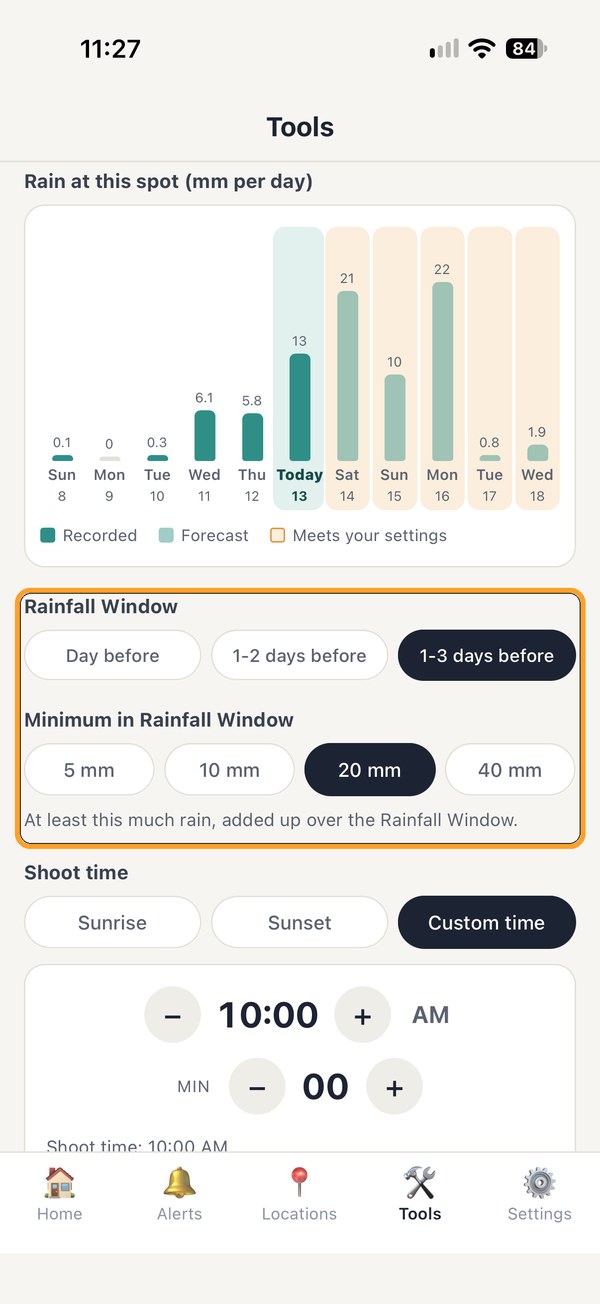
Under Rainfall Window, choose which days before your shoot count: Day before, 1-2 days before or 1-3 days before. Under Minimum in Rainfall Window, choose how much rain must have fallen over those days, added up: 5, 10, 20 or 40 mm.
Tip: Days that would meet your settings as a shoot day are shaded amber on the chart (Meets your settings), so you can see straight away when your waterfall should be flowing.
4
Choose when you’ll shoot, then create the alert
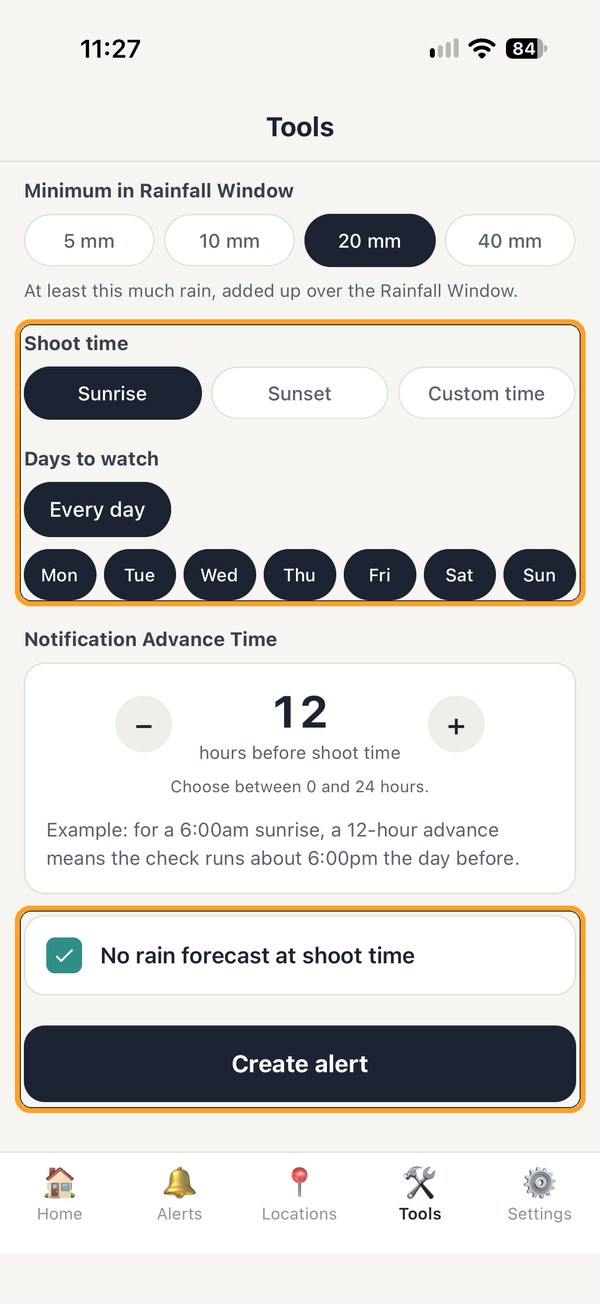
Under Shoot time, pick Sunrise, Sunset or a Custom time, then choose your days under Days to watch (or tap Every day). Notification Advance Time sets how much notice you get. Leave No rain forecast at shoot time ticked if you’d rather stay dry, then tap Create alert.
Tip: Create alert stays greyed out until you have picked a shoot time and at least one day.
5
Your alert is saved
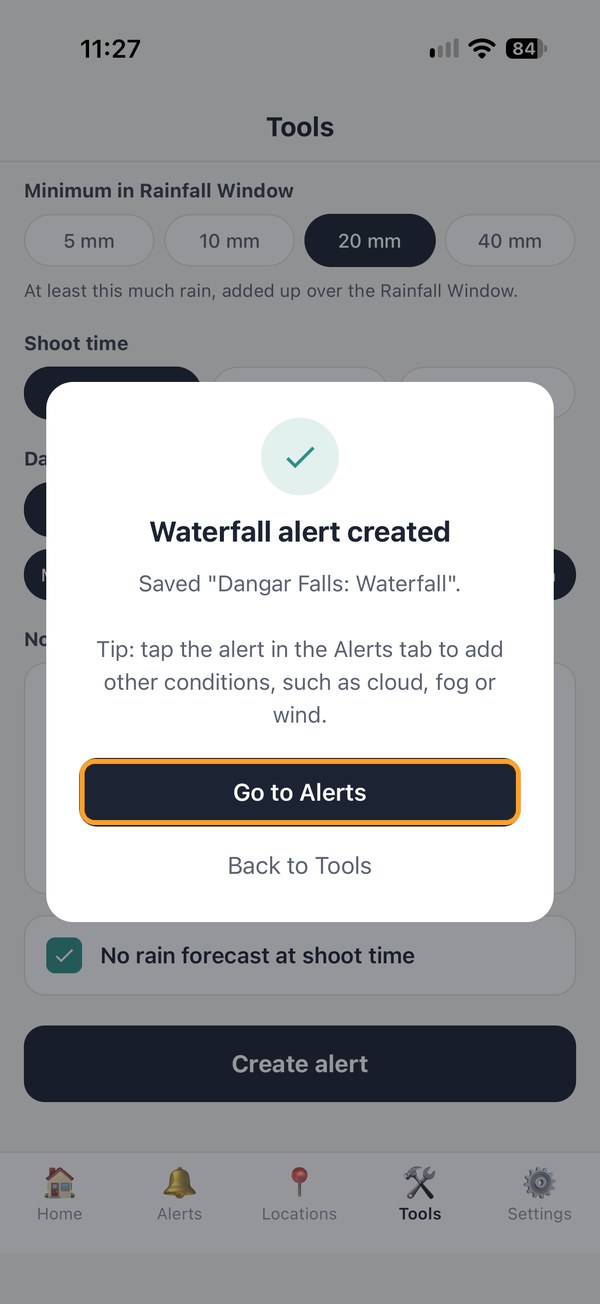
A short message confirms the new alert. Tap Go to Alerts to see it, or Back to Tools to plan another waterfall.
Tip: If PhotoWatch has not recorded enough rain at the spot yet, the message says so. Notifications start working about three days later.
6
Check your conditions
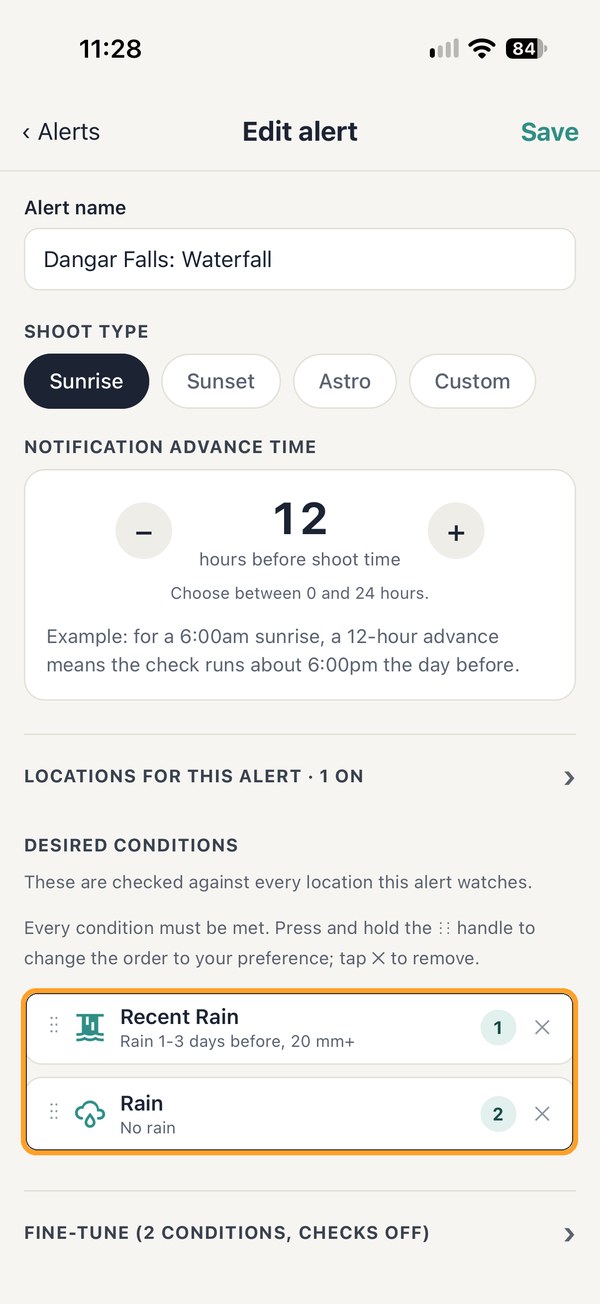
Your alert is named after the spot, for example Dangar Falls: Waterfall, and already has Recent Rain and, if you left the box ticked, Rain set to no rain. Add any other conditions you like, such as cloud, fog or wind.
Tip: Every condition in an alert must be met. The built-in cloud and rain checks are switched off for waterfall alerts, so a grey morning after heavy rain won’t stop the alert. Add a cloud condition if the sky matters to you.
7
Fine-tune it any time
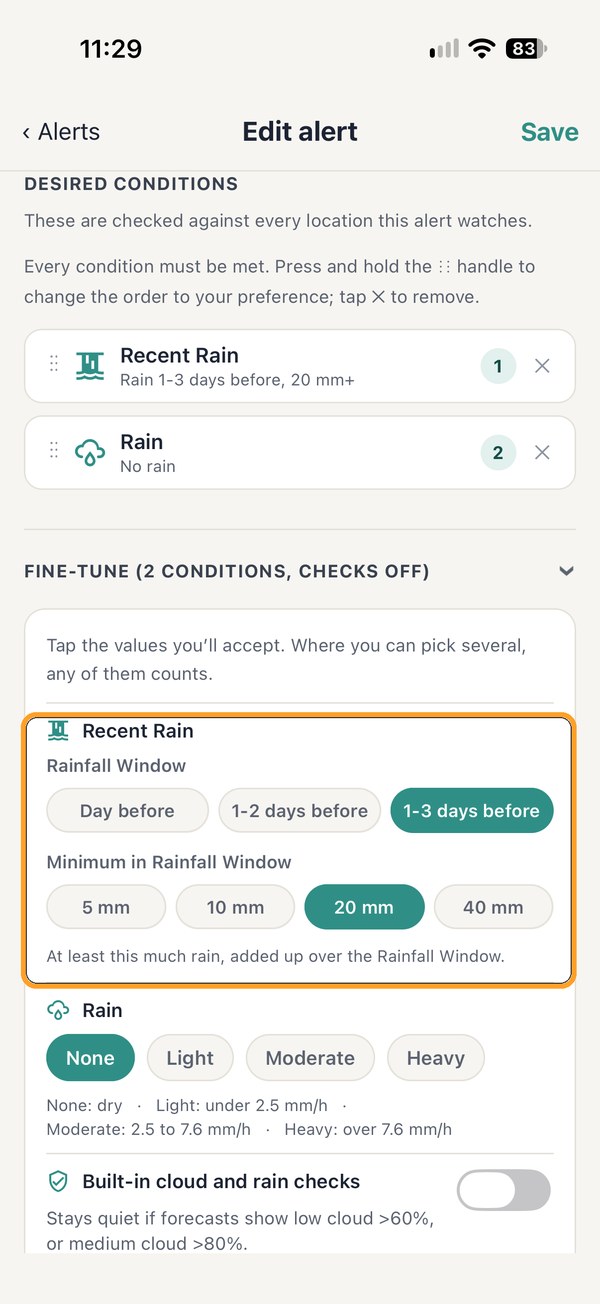
Open Fine-tune in the alert to change the Rainfall Window and Minimum in Rainfall Window, or the Rain choices, then tap Save.
How it decides: PhotoWatch adds up the rain on the days before your shoot day, in the spot’s own local time. Days already gone use the rain it recorded; days still to come use the forecast, so an alert can arrive early when good rain is on the way. If any day in the window is unknown, the condition is not met.
That's it. Go get the shot!
Set it once and PhotoWatch keeps watching the rain for you, every day you chose.